Thursday, December 22, 2011

Pudding origami box


Well, Christmas is upon us!  Last year has evaporated and the New Year is looming.  I can't imagine anyone having any last minute wrapping to do - no sirree.  But, just in case, I have this nifty little 'pudding' origami box design if you have a teeny tiny (or I should say 'wee', Lee) little present you might want to wrap.  The finished size of this box is just under 2" square (~ 4.3cm) so it would be perfect for small jewellery.  A link to the instructions on how to fold it is here.


The lid of the box is the slightly larger square on the printable of course.  Just fold it exactly the same and it will fit snugly over the base part.  One note for the lid, the first two folds are to highlight the centre of the square for you to fold towards - to save so much creasing on the finished product just take a ruler and pencil and mark an X in the centre on the reverse (white) side.  This will give you a neater finish at the end.  I forgot to do that on this one and you can see the more noticeable fold lines on top.


I have to say, they are quite therapeutic to make.  These are the first ones I made.  I need to find a use for them now...

With that, I am going to wish you all a very Merry Christmas (or insert appropriate greeting for your circumstances) and I am going to be back in the New Year!  Hope you all have a wonderful and special couple of weeks!  (fellow Minnesotans/normally snow covered bloggy friends, where is our snow????)

Wednesday, December 14, 2011

Dollhouse Christmas

Christmas is arriving with the speed of an express train it seems.  I keep having ideas for things to do, things to decorate, only to realise it will all be over very, very soon.  Miss E and I took a breather from activities, home work, house work, shopping etc. to sit down together and decorate her cereal box dollhouse.  It was a lovely 'slow' activity to do together.


Monday, December 5, 2011

Gift wrapping


Here is one idea for gift wrapping I am going with.  I printed out some sheets of paper I designed last year (snowflake in red here, dotty stems), wrapped red yarn around and popped it through some labels I designed and printed out from MS Powerpoint.  I really like how these turned out.  If you would like similar labels you can download them here.  It is a Powerpoint file so you can add your own text if you want (plus in three different colour ways).  I also did rounded rectangle ones that are WAY easier to cut out.  That little notch in the corner?  Pain in the butt....

Oh, I just realised I never posted a link to the snowflake paper in blue...oops.  Here it is if you want it.

Thursday, December 1, 2011

Advent calendar


Phew, Christmas is approaching with the speed of a runaway train it seems.  I made up these quick advent chains today for my two kiddos (look! a sprinkling of snow - it is late this year I think).  I already have an advent box setup that I will use with the kids as well but I love the visual effect this one has.  This is so quick and easy that you could whip it up today before the kids get home from school and still be on time.


I printed off three of my paper designs in my Christmas themed colours of red, white and blue plus I used a plain piece of white paper.  Cut them all up into strips, loop and staple, loop and staple, add a bit of string at the top to hang from a curtain rod or wherever you like.  Now A wants to make a bunch more to hang elsewhere (I think my detail oriented side will win and I might have to use double sided sticky tape instead of staples on that one...).

If these happen to be your colours as well, I have created a pdf with all three for easy download (click here).


Oh, I had to share.  Mini trampoline meet pear shaped terrarium.....  (Just to explain - terrarium was on lower shelf on bookcase, kids rested mini tramp on it's side at the end of nearby sofa, mini tramp was bumped and fell over, leg struck my pretty pear.... boo hoo - but, it's just stuff, and no-one was injured so it is all good! - what do you think my chances are of finding another one in a thrift store??)

Friday, November 25, 2011

How was your Thanksgiving?


Well, I hope all my American bloggy friends had a lovely Thanksgiving yesterday.  We aren't native here but I really enjoy this holiday and I wish we had something similar in Australia.  Actually, there is an official 'Thanksgiving Day' in Australia but no-one knows about it and it certainly isn't celebrated.  I might start an online lobby for it to be celebrated in July in Australia - we need a good celebration in the cold part of the year so we can enjoy the yummy hot food too (obviously the most important factor when deciding these things).  Turkey in December when it is steaming hot is not the best (though many of us labour on with it - and add fake snow to our windows to boot!).


Not having any family here, we had a very quiet, simple day.  We invited some friends over for breakfast (which was just lovely and helped stave off any homesickness) and then we put up our Christmas lights outside (before it gets too cold) and had a very simple turkey dinner.  In the morning I put out my berry branches and punched a bunch of circles out of craft paper for everyone to write what they are thankful for to hang on the tree.  The kids got really into it and continued on throughout the day until it was looking quite full.


My son isn't a confident writer yet so he dictated his list to me - this one is my favourite.  I felt good that he got down to appreciating some of the simpler things in life after he listed off things like the Wii and iPod first!

Thursday, November 10, 2011

Thrift Store Thursday - doily bowl


Have you ever made one of these?  Stiffened a doily with fabric stiffener and draped it over a mold?  This is a very quick craft and great for kids too.  Miss E saw me make this and wants to do some too.  I have a whole heap of doilies from my Nana but I can't quite bring myself to make them into bowls so the thrift store will be my friend again (yep, had to twist my arm on that one...).


I think I am going to use this on my desk to hold office supplies (like my covered bulldog clips).

Tuesday, November 8, 2011

Furoshiki wrapping cloth


So, this is what I made with my stamp.  A japanese furoshiki cloth for gift wrapping and a little matching stamped tag.  I will do a tutorial for this by the end of the week.


I think these are lovely and simple and I love the reusable nature of them (I will be including a little note about the art of Japanese gift wrapping - tsutsumi - with each Christmas gift I use these for).

Friday, November 4, 2011

Stamp me


If you have been around here for awhile you might remember my foray into stamp carving.  I busted out my snowflake stamp for some plain white fabric.  I hope to finish up this project tomorrow and I can show you what I have done with it.  I highly recommend stamping fabric though!  Very satisfying.

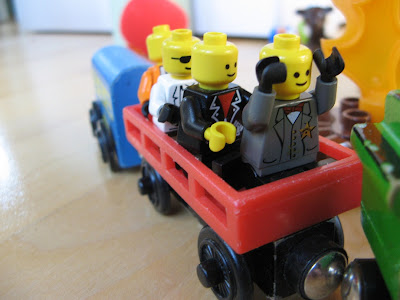
On a totally unrelated note, I have had A home the last three days with a nasty cold (imagine green slimy nose and gross cough and you have it).  I never, ever tire of his Lego and Playmobil people setups... they crack me up and I love watching his imagination at work.

Do all kids like to line stuff up?  


If I don't get back, have a great weekend!

Wednesday, November 2, 2011

Thanksgiving on my mind

Well, Blogtoberfest has ended and I really enjoyed it.  I am quite happy with my effort even if I did miss the last day!

Did you all survive Halloween ok?  We really had fun.  It was hectic but a great deal of fun.  For our kids there is always that element of 'is this the last time I get to do this?' as well.  We never know where we will be in the next year so we really enjoy these things while we can.  For the record, Halloween in Australia (well, from when I lived there anyway) is not very big.  Some people might have fun Halloween parties, might decorate a little bit and so on but nothing like here in North America.  Trick or treating is pretty uncommon too.  It is gaining traction though so maybe it might be more popular when we get back.  It doesn't feel quite the same though as it is usually already hot by the end of October so the whole autumn atmosphere is missing.  Anyway, that never stopped us from putting fake snow in our windows at Christmas even in sweltering heat!  We are funny (odd?) like that.

Well, now that Halloween is over, we get to think about Thanksgiving coming up and then Christmas.  In the spirit of that, I will show you what I have pinned for inspiration for Thanksgiving so far.


Definitely making these for the kids...


Might use some of my blue mason jars like this for our table decoration.


My little fabric acorns would look cute hanging from branches!


I would love to build a little black bench for the front porch (need to do that before my garage gets too cold!).


I love this card.  I think I might buy it just to frame.  The illustration work is so cute and vintage'y (that is a word...).

Click through here to find all the original source links.

Sunday, October 30, 2011

Day 30 - Quick last minute Halloween decorations

Halloween kind of came too quickly for me this year.  I have been pinning fun ideas, recipes etc. and then, bang!, it's here and I am not really ready!  Sometimes I spend way too much time thinking about and planning for something rather than actually getting it done.  Tell me I am not alone in that! (no need to respond Anonymous - aka B!)


I did manage to do this idea above though, at the begging of my children to decorate properly (you mean the electric jack-o-lantern in the window and the foam bat on the front door isn't enough??).  This isn't my house obviously but I used this idea on our front door (and side glass panels), as well as adding a couple of hanging black lanterns with orange candles on either side of the porch entrance plus some carved pumpkins and fake spider web I had from last year and we are looking quite festive now!  I will have to try and get a photo of it for tomorrow.

Lesson learned? - start decorating for Thanksgiving immediately and I might actually have it done a few days before the day!  Ditto Christmas....

Saturday, October 29, 2011

Day 29 - why do they make lamps like that?

Well, the last 3 days have been crazy busy!  Between play dates, windows needing replacing, gymnastics classes, karate classes, school functions, girl scout functions and trying to keep on top of washing and so on, the last few days have been a blur.  Loads of fun but a blur.

I did manage one little thing I wanted to share with you though.  This is one of those ultra simple little problem solving ideas that just makes you feel quite a bit clever.  I shall explain my dilemma.

You know what I really don't like about bedside lamps?  Where the switches are located.  They are either up under the shade which requires having to sit up to turn off (yes, I realise how whiny and pathetic that just sounded but bear with me - I am guessing I am not the only short armed or very tired person who finds that annoying when you are all snuggly in bed ready for sleep) or they are placed on the cord about a foot down from where the cord enters the lamp base.  Why?  How is that supposed to work?  The switch always falls down behind the bedside table then.  I just don't get that design.  Why don't they all just have the switch in the base of the lamp like hotel ones mostly do?  Well they really should.  Maybe I will design a bunch of bedside lamps just like that and everyone will sigh with relief that they can buy them...


So here is my solution.  Cable ties.  Simple as that.  Tie that sucker to the bedhead so you can reach it easily (but it isn't really visible if you slide it down close or below the mattress line).  Now, obviously, I have the type of bed that is easy to use cable ties on but I am sure, if you have the same problem and a different style bed, this could inspire you to find a solution.  I love it!!

Wednesday, October 26, 2011

Day 26 - Random stuff

I still have my awful, awful headache (if it goes for longer than a day even after taking painkillers is that technically a migraine? - I can still function though).  All thoughts of crafting/making over our bedroom have been abandoned for now.  So far today I have managed to get dressed and fold two loads of laundry and that will have to be it.


Yesterday, I did get my movie program framed (not hung obviously).  Wow, that yellow looks neon in this photo.  It is actually a much calmer sandy yellow in real life.  Didn't that frame come up a treat?  I love it now.  Our bedroom is going to be white, grey and yellow with touches of purple when I am done.  I have some fabulous ideas and can't wait to show you.


Oh, I also managed to walk the kids to the bus stop this morning and lookie what I found beside one of my distant neighbour's rubbish bin?  Niiiice.  I have been looking for one for the kids playroom for all my indoor plants to live on for the winter so I can have them in the sunniest room in the house but be able to wheel it out of the way when needed.  I had a quick look at it as it seemed broken but there is just one little screw missing and it could use some new glue.  Easy peasy.

One other random thought, I just thought I should let you know that all the planets must be aligned in some 5,000 year random pattern.  Want to know how I know?  Not one, but two, family members random socks all matched up!  Amazing but true.

Tuesday, October 25, 2011

Day 25 - Pop up paper craft


I have a splitting headache today so a very quick post from me.  I made these for A while he was eating lunch.  My kids can't get enough of them and I must admit they are fun to make.  I found the idea on Pinterest (original link here).

Monday, October 24, 2011

Day 24 - Old frame makeover


I have had this picture (that I probably bought in the late 80's/early 90's) languishing in our basement waiting for a makeover.   Stylin'!  Look at that lovely yellow frame... (excuse my totally crappy blurry photo - A has developed the bad habit of trying to run into every shot I take so I was trying to be quick before he noticed me!  Little angel...).

Well, hubster is away for a few days so I decided to give our very bare bedroom a bit of a makeover (I may or may not show photos of this - depends how it all pans out).  Nothing drastic but I haven't added any homey touches to it since we moved in a year ago and I figure we need a nicer space for ourselves.


First up, this frame is getting a beautiful coat of shiny black.


Random aside - A has been dying to spray paint something (ever since he found my spray paint can stash) so he grabbed some blocks of wood and joined me.

I am ditching the old Van Gogh print (didn't everyone own one of these at some point??) and replacing it with a movie program from a favourite restored Art Deco theatre (the Astor Theatre - if I have any Melbourne readers) we used to frequent when we were young and starting out in Melbourne, Australia.  I have had this poster for just as long as the Van Gogh print I think.

I will show you it all framed up tomorrow - it is past my bedtime now... 

Saturday, October 22, 2011

Day 22 - Security envelope re-use


I pinned this image in Pinterest a short time ago because I thought this was such a clever and simple idea.  I really like the patterns inside bill and junk mail envelopes and, as this person did, if you turn them inside out you can reuse them.  Love it.


I have been saving envelopes for a little while after I read somewhere else about using the cute patterns for paper crafts so I had a stack of them waiting.  Only problem was most of them were window faced envelopes so I decided to rip them open, make a mini envelope template and make a stack of little envelopes.  I thought these would be so cute for gift tags with little cards made to fit inside (that reminds me, I have two miniature cards and envelopes that I think I bought when I was about 12 years old and have never used because I just adore the cuteness of them - random thought).


Then, of course, the brain doesn't stop there.  Wouldn't tiny little address labels look cute?


How about tiny little stickers to close them?


Hmmm, who should I mail this to?  Look, she is so happy to be getting mail!  I think even my non girly daughter will love these.

I have another idea for these that I hope I get to tomorrow.  It will be great if I can get it to look how it looks in my head right now.  I know, it is an exciting world over here....  :-)

Friday, October 21, 2011

Day 21 - Cane basket makeover

Dang, knew I shouldn't have kept numbering the days!  Then you might not have noticed a day missing - la la la.


I have this little basket that I use for small hand sewing projects so I can carry it around from room to room (for things like felt acorns one might say).  I felt like doing something to the handle so this vintage twill tape came to mind.  Little dab of hot glue one end, wrap it around and secure with hot glue at other end.  I think I might like it painted white too but I was too impatient to do that today.  I just might have another basket around here somewhere that I can do that to (ha ha, Lynette, I still find a basket hard to resist at the thrift store!)...


Wednesday, October 19, 2011

Day 19 - Fabric acorn tutorial


Remember these cute little guys?  I thought I would show you how I made them.  You probably don't need a tutorial for these but, hey, I have 31 days of blog posts to fill!


Cut out a little circle of fabric (I eyeballed it) and stitch around the outside (no prizes for neatness here - just get that gathering thread around there).  Pretty much how you would make a yo-yo.  Without the neatness.


Pull the gathering thread, add some stuffing inside as you gather.....


pull it tight and knot the thread.  I normally get it tighter than that so you can't see the stuffing but the little sucker slipped as I tied the knot.  It is getting squished into something so I am not too perturbed.


Take your selection of acorn caps and shove it into a few to see which one fits best.


After you have chosen the cap, take the little fabric ball out, squirt some glue into the acorn cap....


and squish the little ball back in there.  Let dry and then do 10,000 more to fill a small apothecary jar... (anyone have some more acorn caps???)

This post brought to you as part of Blogtoberfest.

Tuesday, October 18, 2011

Day 18 - Thrift Store Tuesday

Dang, I missed yesterday... just too busy...

So, today I am back with some thrift store goodies plus I would love some ideas.


I found these vintage fabrics (just had to get them - they remind me of something we had in the 70's as children - Lynette or Sheryl, do you remember what?? did we have clothes in this sort of fabric?).  I don't usually lack in the ideas department but any ideas for what to make with them?  I thought I might use some of one to make an a-line knee length skirt for E to wear.  Trying to think what else to do with them....  I thought of cute soft toys but I don't have the need to make any with my kids being older.  I like these coloured plastic embroidery hoops for the kids to use too.  They look pretty on the wall when you hang them in a child's room.


I also bought this beautiful crystal bowl.  I think I am going to give it to someone as a gift but not sure.  I might just re-sell it on eBay.  I bought it because my Mum has mentioned on more than one occasion some red drinking glasses that she missed out on at an auction and I am always searching for some for her.  I am not sure if this is the style she meant or not.  Sandra, is this what those glasses looked like??


I scored these two glass bottomed lamps for just $5 ea.  Pardon the bad light, they are being stored in the basement for now.  Obviously the shades need to be changed (somehow my living room just isn't going to rock the disco vibe) but these lamps are usually pretty pricey so I am very happy with these.  I don't have many lamps as the ones we brought here all have different plugs (from different countries) so these will do very nicely.

I hardly ever shop at Target anymore!

LinkWithin

Related Posts with Thumbnails