Showing posts with label tutorial. Show all posts

Friday, January 13, 2012

DIY ping pong


A has had it stuck in his head that he wants to play ping pong (table tennis - whatever you want to call it).  To the point that he made the net himself and he kept asking me to buy the bats (paddles? what are they called officially?).  Before I felt like going shopping for them I decided to have a go at making some.

Cut two handle lengths from a sturdy cardboard roll.

Cut slits on opposite sides (just eyeball it). 

 Use something round to mark out your circles.

Cut out the circles. 

Squish the circles into the cut slits on the tubes.

I have to say, these lasted longer than I anticipated.  I think we probably got a good 8 - 10 hours play out of them (over a few days).  If you want them to last longer you could use some duct tape to secure them as well.  I was just buying some time until I went to the shops (and also seeing if the desire matched up with the activity to be honest).  We had a lot of fun using these on our coffee table before we got annoyed with the small size and I relented and bought some bats and we are still using the net on our dining table now.  I have played many, many, many games of ping pong over the last week....

By the way, HAPPY NEW YEAR!  I haven't been in this space for awhile so apologies for that.  I have some health issues I am dealing with but I won't bore you with the details - hopefully it will all be sorted out soon.  Aside from that, here's to a great year ahead!

Friday, May 14, 2010

'Meaning to Finish' Project Week - day whatever

I barely even know what day it is, let alone keeping up with project days right now!  ha ha.

Ok, well, I am making some progress.  I haven't exactly been powering through mod podge land yet but I have completed a few things to show you.

The kids did more of the Sharpie Softies (Lord A did one too - so cute!) awhile ago and I hadn't finished them off for them so they were happy to cuddle them finally.


I covered a plain little craft box to make a gift box for the girly hair bow for my friend.  My little box went from this:


to this:


I really love that effect of the two different patterns for the box and lid.

Next up is a DIY padded mailing envelope.  I can't buy padded envelopes for posting gifts and so on at the moment (this is a veeeeery long story....) so I made my own using a regular office supply envelope.....


some bubble wrap cut into two rectangles and made into a pocket by using clear packing tape to seal 3 sides....


and then pop them into the envelope and bob's your uncle!


Love it.  Oh, I forgot to take a photo of my snazzy label I made.  I will do that another day with another parcel I have to send.

I also bought one of those plastic organiser boxes (like the ones for beads) to organise my stationery but I am pretty sure you don't want to see a picture of that (although I do have very cute squirrel clips and penguin paperclips!).  Have a good weekend everyone!

Monday, May 3, 2010

Giveaway is here!


Yay, the planets have finally aligned and I have my giveaway ready!  These little play oven mitts are not difficult to make but to explain the whole process I have put together quite a lengthy tutorial which you can download below.  These would be so cute for any little kid that loves their play kitchen or it might encourage them to play with it like it does mine.

Kids Play Oven Mitts

Here is a quick overview of how to do it for more confident sewers.  I am sure you could work it out yourself anyway.  Like I said, they are not hard, nor particularly time consuming if you have access to a sewing machine.


When we lived in Malaysia a few years ago, the hotel we stayed at had a children's play area with one of these little mitts.  All of the kids went straight for it and I kept on meaning to make some for my children after we left there.  So I finally have.

Now, this is where the giveaway part comes in.  I have made two sets so tell me which one you would prefer (out of the two pictured at the top of this post) and I will send it off to you!  All you have to do is leave a comment on this post (and make sure I can contact you).  This giveaway will close on Saturday, 8th May 2010, 12 noon, Uruguay time.  This is open to all readers - I will post to anywhere in the world.

Good luck!

Thursday, April 8, 2010

Easiest cushion cover ever


I love this method of making cushion covers.  It is dead easy and so satisfying to whip them up in ten to twenty minutes.  No zippers or buttonholes either.  That is always a good thing!  Please excuse the bad lighting in these photos - it was just one of those days with weird patchy cloud cover and I didn't have time to wait for the exact right lighting for each shot.

Firstly, I just cut out a length of fabric a little bit wider than my cushion insert and long enough to wrap around with an overlap of about 10cm (4in).


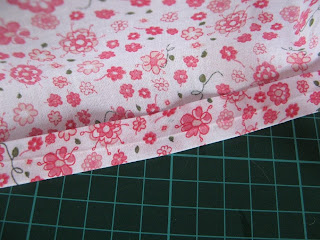
Then I finished off the short ends with an ironed, folded and stitched hem.  Actually, one of my hems was a selvedge so I ended up only doing one.


Then I wrapped it around the cushion firmly with the right side facing in, pinned the overlap and slid the cushion insert out so I had the correct sizing.  I overlapped it so that my finished hem would be on the outside once it was turned inside out.  If you hem both ends this won't matter so much.


Then you just stitch the sides up.  I prefer to use an overlocker for this step but I don't have access to one where I am so I just stitched it normally.  Ha ha, look how wonky my fabric is.  I pre-washed this fabric and it went a bit twisty when it dried - not sure how that happened.  Anyway, once it is stretched over a cushion insert it doesn't matter.


Then you are done, just turn it inside out and put your insert inside.  This is how it looks from the front and back.


I cannot wait until we move to somewhere near some decent fabric shops so I can redo these in some funky fabric instead of brown!  Not that there is anything wrong with brown but it is just not me really.  I am a colour girl through and through...

Friday, February 5, 2010

Lined felt storage basket - quick and easy!


I got the idea for this from some little girls' handbags my sister made a number of years ago for a market stall we were running.  We have a few leftover that are still in storage at our Mum's house and, whilst I was visiting over Christmas, I was trying to think of a way to reinvent them.  So I thought of removing the handles and lining them to make little storage baskets.  I actually forgot to bring the little bags back with me so just used a sheet of craft felt I have here.  These take just one sheet of craft felt and the same amount of fabric.  Craft felt is all I have at the moment but I imagine a whole shelf lined up with ones made of wool felt would be so gorgeous too.  Here is how I made it:

1. Take your sheet of  craft felt and cut out your lining fabric to the same width and just a little longer in length (for the folded over stitched lining look).


2. Fold both in half (fabric right sides together) and stitch up both sides.


3. Open them both out, mark a stitch line to create your base (I measured it to be 4.5cm in from the point).  Stitch the bases on both the felt and the fabric.  You can make the base on your fabric slightly smaller if you like but it won't make that much difference to the 'fit'.  You can trim those triangles off as well after stitching but I left them on for added sturdiness.


4. Turn your felt inside out so the seams are on the inside.  Place the fabric inside to check the fit.  Fold the excess liner over twice towards the outside of the felt so it is sitting snugly around the top.


5. Take the lining out and iron this so it sits neatly while you are sewing it on.


6.  This is where I deviated from my original idea of just felt and lining and decided a cute little label holder would spruce it up nicely.  This needs to be stitched on before the liner.  I was winging this part so I just cut out a base of felt and a slightly larger piece of my lining fabric.


7.  I then butchered my fabric in the middle and folded it over the felt and stitched it down around the inset and then folded the outside around and stitched that down close to the outside edge.  If I hadn't been so impatient to see the end result I would have done this a lot neater!!  Just ignore that bit.....  As a side note, I used a felt core for this because the lining fabric is so lightweight but I like the end 'quilted' result anyway.


8. I then stitched this on around the sides and the bottom edge (leaving the top edge open to slot the label in).  Fit your lining back into the felt and stitch around the top edge securing the lining to the felt.  I cut out a rectangle from some clear plastic packaging and slotted that in to protect the label as well.


Then you can fill it with bits and bobs in your child's room and admire your handiwork.


(and make a mental note not to rush so much next time and get the seams straight!)

Wednesday, July 29, 2009

Desk organiser from recycled tin cans - tutorial


Finally, I have some crafty goodness happening! I have been missing it a lot. I have done a tutorial on how to transform basic food tins into a cute and functional desk organiser. This is one of my favourite crafts actually - there is recycling, there is (mostly) 'free' and there is wow 'before and after' factor! All great elements for crafting.

I have done the tutorial as a PDF download. Click here for your copy and make sure you let me know if you make one yourself.

Notes:
- I don't have access to good quality spray paints but I think a Rustoleum paint would give much better coverage.
- If you want the option of changing the look of your tin, just wrap the paper around and secure with double sided tape.

Tuesday, June 9, 2009

Boardgame box tutorial

Update! - see prettier lid here.


Ok, well this is the tutorial that I have been trying to get to for weeks. The half finished box has been sitting on my desk mocking me. Anyway, it is done now and here are the pics to show you how to do it too. Right at the end are the things I learnt along the way and how I would do it differently next time.


This is the poor, sad, battered box beforehand. Such lovely soothing colour combinations too.

I measured the size of the gameboard and then added how much I thought I would need for the game pieces and what height I would need for the sides of the box.


I used an old moving carton for my cardboard but would use a thinner cardboard next time. It threw out my measurements somewhat when I hadn't accounted for the thickness of the walls. I measured out my previous calculations on the cardboard and cut it out, removing the corner tabs. I would have kept them for added strength if the cardboard was thinner. I also scored along the folding lines.


I folded up the sides and added a little piece of strong duct tape to each corner to hold it in place.


Then I added another longer piece for reinforcement.


I placed it on brown kraft paper and cut out tabs for gluing around the edges for a neater finish...


like this. I also glued the paper all over to adhere to the cardboard for a flatter finish.


Here is the bottom of the box with the completed covering of brown paper (I just like the utilitarian look of brown paper but anything would work that you like).


Here is the layout of how I calculated the insert to accommodate the game board and the game piece section with a division between the two.


Here is how mine looked cut out...


Here is how a side elevation of it folded would look. I really only included this picture because I was so happy with my little diagram!


Here it is folded in the box with the game board in residence (I used double sided tape to keep the sides of the insert flush with the box). Now, for the lid, do exactly the same basic box structure and just add enough in the measurements to allow the lid to fit over the bottom box. I had to add a lot to my measurements because the cardboard is so thick but you would need less for a thinner material. Once I had the brown paper covered lid finished I wanted to add the name of the game on top so...


I printed out the title in the font I wanted and then laid it straight over my chosen paper to cut around. I used a good pressure to cut through both pieces of paper so I only had to do this once. If you do this, cut out the inside pieces of a's and o's first.


The completed box! Yay!

It looks so much nicer on the shelf than the regular garish boxes if you have to have them out on display. I think I will add a nice label to the side as well now I see it on the shelf. That would be necessary if you had a bunch of them on a shelf too.

Ok, things I learnt along the way:
- the old saying 'measure twice, cut once' is very, very true. Winging it just doesn't cut it here. Trust me.
- I would seriously recommend a thinner cardboard. Whilst my new boardgame box could probably withstand a hurricane, that sort of thickness really isn't necessary and created a lot of hassle with the measurements. Plus it wasn't as easy to get a pretty finish with the covering.
- I would use spray adhesive to secure the paper to the card after the shape is cut out but before it is folded into place. I just don't have easy access to those sorts of basic materials. I had to use a bunch of glue sticks instead!
- Don't make the measurements for the divider the same height as the box. It needs to be about 1cm less than the height of the sides once folded. Ditto for the sides of the insert.
- As much as I like the look of brown paper I will probably try something a bit more colourful next time - a brighter colour, basic stripe or polka dot would look great. Also, I worry how it will stand up to regular use. I think leftover wallpaper or oilcloth would be a sturdier cover or I might even use a pretty paper and use a spray varnish over the top. One day when I have access to such things I will do another and see how it comes out.

I could see a whole set of boardgames done this way sitting on a shelf all stacked prettily and in full view...

Anyway, I hope you like this and, if anyone else does one, please show me your finished project!

Saturday, April 18, 2009

Yo yo headband tutorial


I have wanted to do different things with yo-yo's for awhile now and thought this a likely project. I hope you enjoy it too! It was very quick and easy. I will be making a couple more I think.
These are the things you will need: a circle of fabric approx. 17cm diameter, a circle of felt (I would have used my pinking shears if I had them with me but just eyeballed the wobbly edge) approx. 5cm diameter, some pretty buttons, needle and thread, coloured thread if you want the top button to have a colour other than white.
Stitch in a long running stitch around the perimeter of the fabric circle about 5mm in from the edge (no need to knot the end of the thread). Leave a tail of thread where you started. I used a double thread for extra strength for the gathering stage and for sewing it on to the headband.
Do one tie and then pull the threads, gathering as you pull each end of the thread....

until it looks like this, all gathered in the middle. Whilst holding it tight, knot the thread and cut off the extra thread, leaving the needle end still attached.
Place decorative piece of felt and button(s) on top and stitch up through it all. Stitch through all layers to secure.

Stitch to headband securely underneath.


This is with one button and...

this is with an exta decorative button with the contrasting thread. You could use the coloured thread for the whole project if it will be needed for the contrast on the last button.

LinkWithin

Related Posts with Thumbnails