Monday, October 20, 2008

Busy, busy, busy........


Well, I have been very busy for the last few weeks and feel myself finally emerging from school carnival and shipping container chaos. The school carnival was successfully carried out and much fun was had by all. The very next day our Australian shipping container arrived and I have been wading through way too many boxes and possessions ever since. It would have been fine if I was just unpacking and putting away but, not having seen everything in nearly two years, there was much more sorting (and giving away) than normal. Why did we keep all this stuff???? I really wonder at my state of mind sometimes but many conversations with friends and family has made me realise this is a very common occurrence. I am making a pact with myself to sort through at least one cupboard/drawer every other week to make sure we don't start accumulating unnecessary items again. After two international moves in two years I can honestly say that I would like to keep my house 'pack ready' all the time so we can move with more ease next time. Short notice is not uncommon and to be ready would be much less stressful. I will comment down the track as to how my resolve holds out on that one.

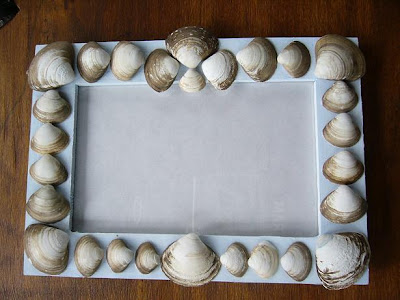
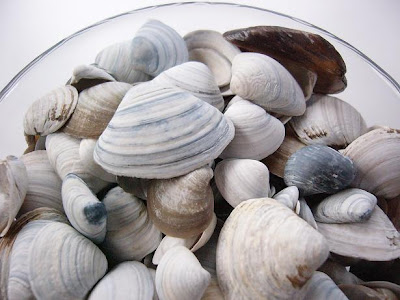
In the meantime Miss E and I did complete a few projects with our cherished blue and white stripey shells and here are the photos of our endeavours. It was very hard to take photos with the glass in the frames so these are not the best pictures. I am looking forward to starting my photography course to learn these things! The top one is a simple project of symmetrically arranged shells inside a shadow frame. Very predictable I know but I like it all the same and I have had quite a few comments on it from visitors so that gives me a nice little buzz.


This one is a joint effort between Miss E and myself. She wanted to make a frame to hold David's annual Father's Day photo of the kids (I take a photo of the two of them together holding a sign - handmade by Miss E now that she is older - saying 'We love you Daddy' or, this year, 'Happy Dad's Day'). The brown toned shells were David's favourites so Miss E just painted the frame a nice light blue and we glued a pattern of shells onto it. I have been trying to find a spray varnish to finish it off but haven't had any luck here yet.


This picture is Miss E's creation and I love it. She mixed the background colour herself until she was happy with the shade, painted it on to a piece of medium weight card, I drew the swan outline and then she applied lots of glue and placed all the shells on top. She finished off with some of her sparkly little 3-D stickers which I think really make it. I will try and take a better photo of it hanging up in her room once we get that done maybe.

Sunday, September 21, 2008

Seashells by the seaside....


Ok, technically it is still the river here in Montevideo and not the sea but hey, it looks close enough to me so I am claiming my right to poetic license! We had a lovely lunch by the beach and then spent an enjoyable amount of time collecting seashells. Well, David, Miss E and I had fun collecting seashells while A found sticks to hit things with and chased the seagulls!


I just love the gorgeously faded, blue stripey ones (of which there are many) and David astutely pointed out that he could see a whole room being decorated around one of those. He knows me well.....

I can feel some framed shells coming on so will post our creative endeavours with these lovely soft coloured shells soon.

Saturday, September 20, 2008

Stitched book instructions


Ok, as promised, here is my attempt at drawing and explaining how to make the little stitched books from my previous post. Warning! These drawings are very primitive!

Step 1. Cut out cover & inside pages (I have given my measurements in previous post). Fold all in half.


Step 2. Unfold and clip pages together securely. Mark & punch holes.


Step 3. Sew through hole 'B' from outside cover to inside pages, leaving a short tail outside. Then stitch up through hole 'C', down through hole 'A' and back up through hole 'B'. Tie the two middle threads (sticking up out of hole 'B') into a knot, around the thread that runs the length of the spine.

Hope that is easy to follow!

Saturday, September 13, 2008

Stitched books & cotton bud (q-tip) paintings


Well, this started out as a quick simple craft to do with my 6 yr old daughter, Miss E, but ended up being a lovely way of spending an hour and a half together one very wintry afternoon. Instead of using plain card or construction paper for the cover, I thought it would be fun to do some painting first for a more decorative look. The painting techniques we used were good ol' watercolours and cotton bud (q-tip) painting using food colours. For the watercolour one we just brushed different colours all over the paper randomly and here are some basic instructions for cotton bud painting if you aren't familiar with it. It is very simple and easy and is even good for the 2 yr olds and up, although I would suggest you supervise closely with the littlies as the food colours can stain.

  1. Add a small amount of water to a small container (I have used an empty yoghurt pot here but I usually use ramekins from my kitchen as they don't tip over).
  2. Add a couple of drops of food colour to the water (I add them with an old medicinal eye dropper so you don't have food colouring dripping down the outside of the bottle).
  3. Pop in a couple of cotton buds (q-tips) in each container you have added colour to (to prevent mixing them up). These soak up the combined water and colour and provide a nifty little drip free paint 'brush' of sorts.
  4. Use these to draw all over your paper.
You get such lovely vibrant colours this way and they dry in minutes so you can use them for other things.
Ok, back to the stitched books. I first saw the instructions for these on a blog somewhere and I am so frustrated that I cannot find it to link to (I am sure I added it to my favourites at the time!) so I am going to try and draw them myself and put them up here in a day or two. I can say though that they are so simple and easy to make and so satisfying that we have kept making them. I use up any size paper so we have them in all sizes ranging from almost postage stamp to the size I have outlined below.
For those pictured our measurements were:
Cover - 22cm x 14cm
Pages - 21cm x 13.5cm
Length of thread needed to sew comfortably was about 50cm from memory, which leaves you with some to cut off but makes it comfortable for tying the knot etc.
I used 5 pages so that, when folded, it gave us 10 but you can adjust that up or down to whatever suits. For the first couple we made I punched holes for us to thread through (and that is easiest for Miss E) but if I am doing them myself I just push the needle straight through without any problem.
We love them and I hope you are inspired to make a whole bunch yourself!

Wednesday, September 3, 2008

Simple felt needle book

Today I am posting a couple of photos of a simple project I have just completed of a felt needle book with blanket stitch binding and a press stud tab closure. I know these have been around forever, as good things are, so I am just adding my little individual twist of style to it. The first photo shows the completed book and the second shows the different coloured felt 'pages' inside.


These are the measurements I used:

Cover - 19cm long x 15cm wide
Inside pages - 17.5cm long x 14cm wide
Tab closure - 6cm long x 3.5cm wide

Instructions:

1. Fold the cover and each page in half and iron the crease.

2. Place the pages inside each other and then inside the cover.

3. Once they are neatly stacked like the finished book, secure with pins through all the thicknesses. This is to stop them moving while you do the blanket stitch binding.

4. Do the blanket stitch binding.
5. Trim one end of the tab closure rectangle to whatever you prefer - I have notched the corners like an office supply label. You could round it also or leave it rectangular.

6. Stitch the untrimmed end to the inside middle of the back cover.

7. I used a decorative flower cutout and button to brighten mine up and then stitched a press stud to the underside. You could leave yours plain or you could stitch a button to the cover and cut a slit in the tab closure to close it. Just use whatever option you prefer.

Thursday, August 28, 2008

Hmmm, how does one start?


As a first entry, are there any rules to follow? I am guessing not so will just comment on my day, creativeness included or not.

Today is a lovely wintery, rainy day here in Montevideo and I have had the luxury of not having anything to do save play with my 3 year old little boy, Lord A, and do some baking. Those two activities inevitably became intertwined and I really must remind myself to enjoy the moment and not worry about extra scatterings of flour everywhere! You know, I never noticed my obsessive-compulsive personality traits until I had children and they started to, in the way only children can, rearrange my life (and often my cupboards!). Anyway, we successfully negotiated the cracking of eggs and the pouring of the flour to make some deliciously simple chocolate chip cookies (or biscuits if you are Australian like me) and banana muffins with a lemony cream cheese icing. Yum! Now, back to playing with Lord A.....

LinkWithin

Related Posts with Thumbnails