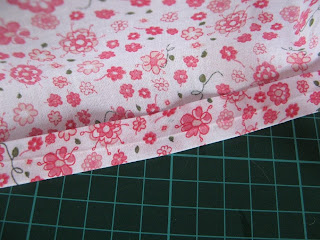
1. Take your sheet of craft felt and cut out your lining fabric to the same width and just a little longer in length (for the folded over stitched lining look).
2. Fold both in half (fabric right sides together) and stitch up both sides.
3. Open them both out, mark a stitch line to create your base (I measured it to be 4.5cm in from the point). Stitch the bases on both the felt and the fabric. You can make the base on your fabric slightly smaller if you like but it won't make that much difference to the 'fit'. You can trim those triangles off as well after stitching but I left them on for added sturdiness.
4. Turn your felt inside out so the seams are on the inside. Place the fabric inside to check the fit. Fold the excess liner over twice towards the outside of the felt so it is sitting snugly around the top.
5. Take the lining out and iron this so it sits neatly while you are sewing it on.
6. This is where I deviated from my original idea of just felt and lining and decided a cute little label holder would spruce it up nicely. This needs to be stitched on before the liner. I was winging this part so I just cut out a base of felt and a slightly larger piece of my lining fabric.
7. I then butchered my fabric in the middle and folded it over the felt and stitched it down around the inset and then folded the outside around and stitched that down close to the outside edge. If I hadn't been so impatient to see the end result I would have done this a lot neater!! Just ignore that bit..... As a side note, I used a felt core for this because the lining fabric is so lightweight but I like the end 'quilted' result anyway.
8. I then stitched this on around the sides and the bottom edge (leaving the top edge open to slot the label in). Fit your lining back into the felt and stitch around the top edge securing the lining to the felt. I cut out a rectangle from some clear plastic packaging and slotted that in to protect the label as well.
Then you can fill it with bits and bobs in your child's room and admire your handiwork.
(and make a mental note not to rush so much next time and get the seams straight!)


This is wonderful. So cute and you make it look so simple. x
ReplyDeleteoooo .. this looks good :)))
ReplyDeleteNice and simple. You´ve just given me an idea for some leg trouser bits...
ReplyDeleteI promise show you the result ;)
I love yor blog, by the way.
Looks great! What a great way to transform those little bags.
ReplyDeleteARGH. I bow to your genius. Seriously cute, woman. Adding this to my list of "quick projects" for February's Thing a Day.
ReplyDeleteAs I promised... I did it and here´s the result
ReplyDeletehttp://otrotrastomas.blogspot.com/2010/02/encontre-el-tutorial-para-este-cesto-en.html
Thanks for the idea and the tutorial :D
I´ll try to do the sock owl next
I love these. I have piles of craft felt that I could use on this project. I think I will make them for Easter baskets. Thanks. Love your blog!
ReplyDeleteLove your blog - so many great ideas. Thank you for this tutorial. I have just made some of these. It was so easy to follow your instructions. I am going to use them for Easter. You can see them here http://midcraftcrisis.blogspot.com/2010/02/lined-felt-baskets.html
ReplyDeleteThese are SO cute, thank you for the tutorial! I just made one in every color for my small fabric scraps.
ReplyDeleteWhat cute baskets!! I'm lovin' the label holders!!
ReplyDeleteI linked to your tutorial on Craft Gossip Sewing:
http://sewing.craftgossip.com/tutorial-lined-felt-storage-basket/2010/05/23/
--Anne
This project is lovely!!
ReplyDeleteI will try to make a similar one!
Laura from Italy
http://chebirba.blogspot.com
I liked this idea so much and I have translated your explanation into Spanish in my blog: http://tuteate.wordpress.com.
ReplyDeleteYou are an artist! I am one of your followers :)
Mireia
Muchas gracias, Mireia! Thanks everyone. I have another quick kid's project coming up using the same technique so watch out for it.
ReplyDeleteGreat!!! So easy, very cute result, I´m a beginner and got my little box in half an hour, your explanations+photos are very clear. Thak you for sharing!!
ReplyDeleteAinhoa